The “minimum viable product” test met my expectations in part 1 of the project log. Next step is finding if there are suitable hardware modules that address the packaging and reliability sufficiently.
I knew that previous raspberry pi generations had a “compute module” variant that was just the “system on module” on a SODIMM form factory. Searching if any touchscreen tablet solutions exist that utilized the compute module, I came across the current generation compute module 4, which uses a pair of high density board-to-board connectors. I found this Chinese company Waveshare (they happened to make my prototype 7” screen), which designed a line of products around the CM4 using it as the core computer. In particular, the CM4-DISP-BASE-5A is a standalone display module that is meant to be integrated by the customer. There is also the CM4-DISP-BASE-7A that comes with built in audio amplifiers and speakers.


A competing product line exists as well: Seeed Studio ReTerminal, with a more industrial design and much higher price point. This was the solution space I considered:
- Waveshare CM4-DISP-BASE-5A - $60. 5” 800×480 pixel touchscreen, 5V 2.5A input. High likelihood of surviving automotive cabin shock/vibe, same with cabin temperature. Weakpoint would be humidity, and un-reinforced connectors such as high density board-to-board, touchscreen FPC. No audio amp onboard.
- Waveshare CM4-DISP-BASE-7A - $120. 7” 800×480 pixel touchscreen, 7~36V input. Same reliability considerations as 5” version, audio amp + speakers included.
- Seeed Studio ReTerminal - $200. 5” 720x1280 pixel touchscreen, 5V 3A input. Potentially better reliability from large heatsink and industrial focus. No audio amp onboard.
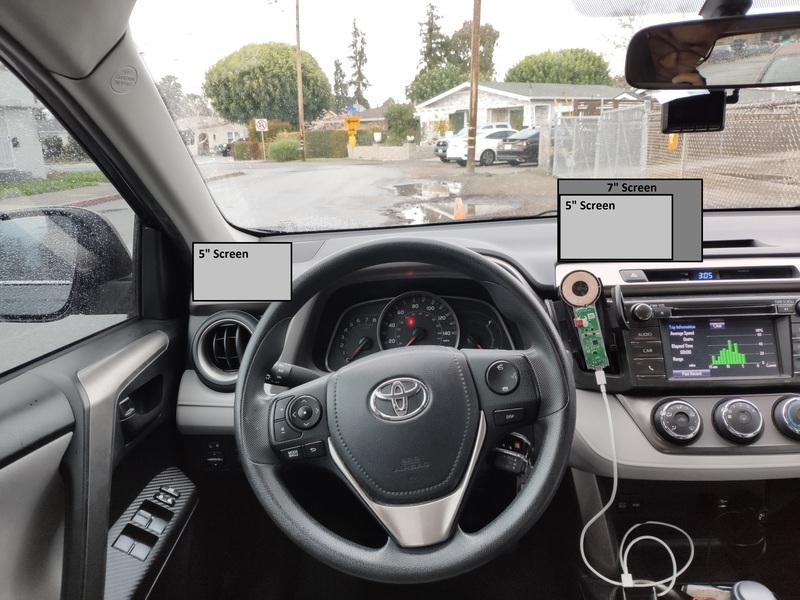
Packaging wise, the feasible screen locations are shown below. The 7” screen has large bezels, will not fit between the left dash trim and A pillar.

For airbag deployment concerns on the left dash, I studied a few crash test videos. The side curtain airbags stop about 6” before the corner of the window, and the retaining cord comes down from the A pillar. The pocket of free space is just enough for something like a 5” screen, in fact the dash trim it would replace is completely visible in the video. As long as it is securely mounted to the dash, the assembly should not impede the deployment nor add additional risk to occupants. Just need to make sure it does not become a projectile (aka overdesign the mounts).

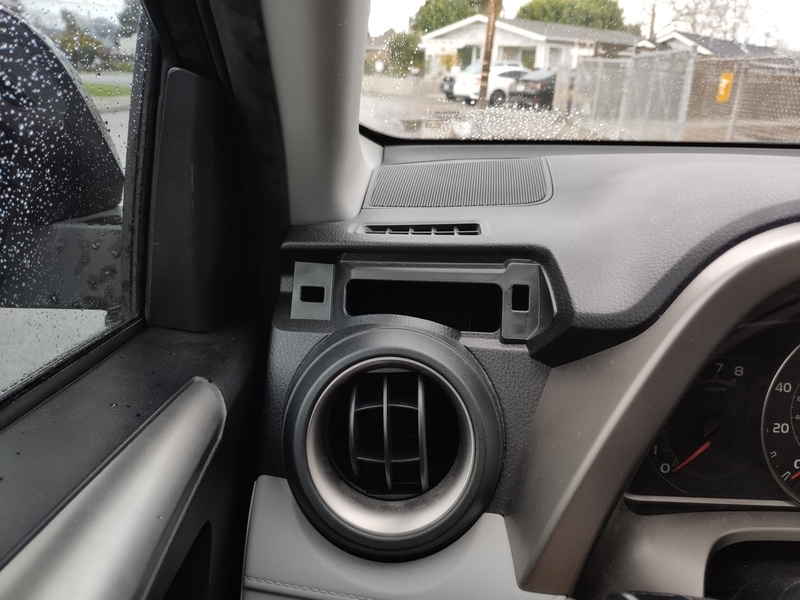
Removing both the center and left side dash trims reveal much better existing features for the left side option. The center long dash trim is anchored with long spaces in between, giving few bolting points appropriate for the length of the screen (ideally 2x with a flat surface to constrain). The left dash trim, although with 2 bolts at different planes, appears to be the prime candidate:


I chose to go forward with the CM4-DISP-BASE-5A screen, mounted on the left dash trim location. Next up is creating the interface geometry in 3D CAD.